Monday, February 13, 2017

The Hungry Goldfish Quilts


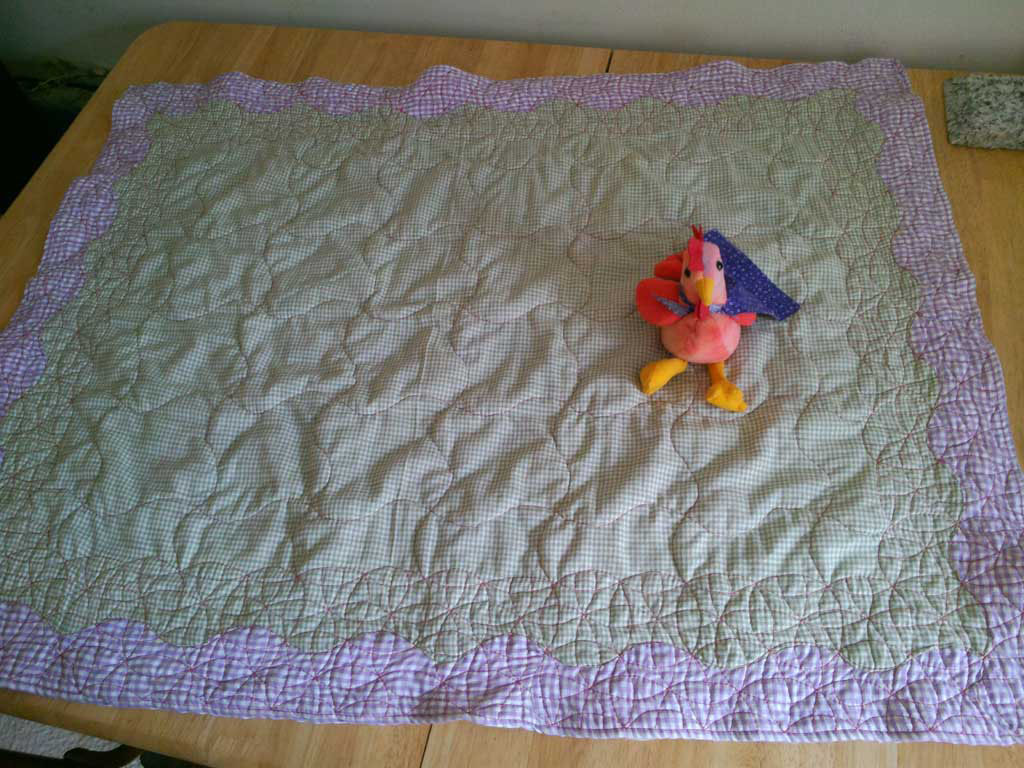
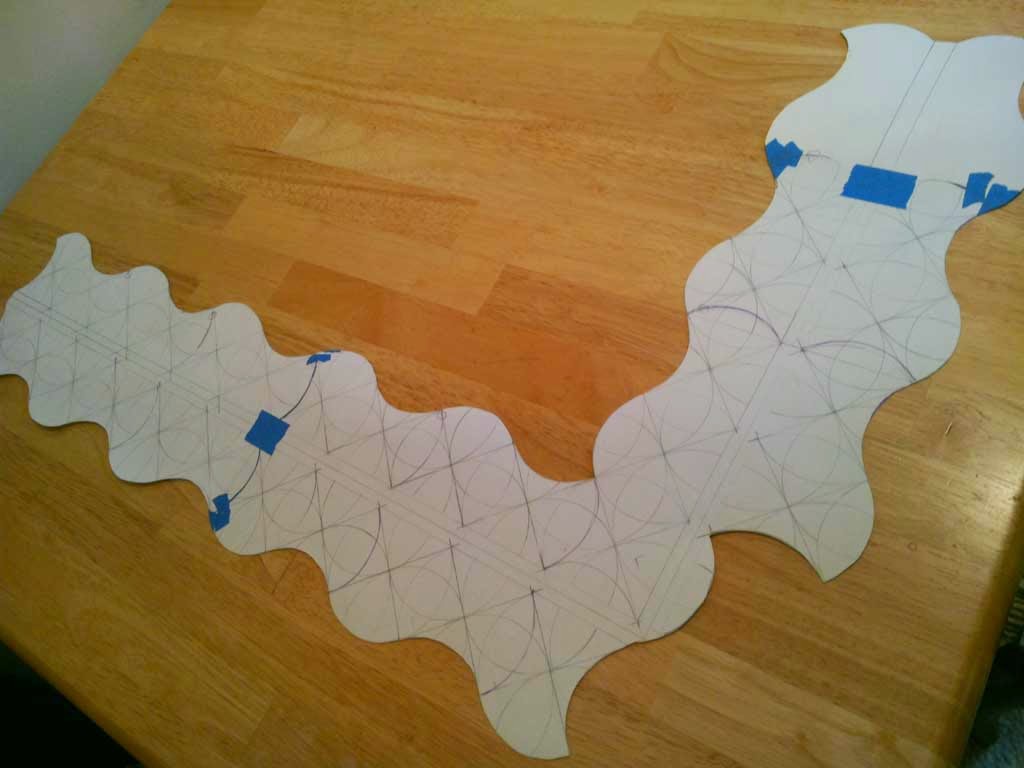
So far this the only example of the "Hungry Goldfish" quilt pattern, and considering it takes a little more than 7 times as long as the last two patterns it may be rare for a while. Still i really like this pattern and at this size the pieces are small enough not need any more than outlining for a quilting method. With such large spaces it should be very soft and flexible. These Hungry goldfish shaped pieces are 31/2 inches wide at the head and so fall well within the maximum recommended un-stabilized width of 3 1/2 inches after shrinking (usually 14%). Since the rounded edged squares showing in the pattern fish are 1 inch across it should be feasible to increase the size of the fish pieces for a larger quilt up to a preshrunk size of 12 inches across. The full two axis network printed on the template should produce round edged squares 3.4056 inches across in the quilting (after shrinking 14%). The pattern fish here should be correct if printed on an 8/2 x 11 sheet.


The closeup shows how hard these pieces curve away from each other during sewing. The method that worked best for me was to create sub assemblies ( the ladies at the Quilt Guild  always asked about the squares, but these sub-assemblies look more like feathers).
Any way it went easiest like this. First they bite, mouth to side in rows. Then they cuddle, the loose tails get one side sewn to the adjacent fish. Then they mesh, the sub assemblies lock tails with the main assembly. My experiment is a baby blanket, currently about 30 x 36 inches but I have yet to finish it off smooth. I would like it a little bigger, but I'll have to wait for more fabric. I'll definitely be showing it off when I get it worked out.


 The "Switch Back" or single row zigzag pattern is the only one I've used so far, but I came up with three more promising looking arrangements.


This one I call "Squared Fish" since it's network also contains the single wiggle square net.


                                                   This one is "Phase Flipped                                                            Fish" since it contains the phase                                                    flipped side slipped single                                                              wiggle square net.


The last for now at least is the"Double Zigzag".

Friday, February 3, 2017

Two Axis Spawns Gold Fish

Again the current project has hit a funding wall! Woo hoo, this means to move forward I have to think. There are still pieces I could add, but I really wanted to just make a back so I could check out the quilting process for this one. Since none of the pieces are more than about five and a half inches across (before shrinking 14%) the batting should be stable even without the string ties in the center of each square (they're not showing yet, no back eh?). I'm excited to see how soft and flexible this one will without the excessively dense quilting I've seen so often. Still every seam will be reinforced by the quilting, plus it looks really old, cool.

 Since I didn't have any big pieces of fabric for the back, and I still wanted to have all the seams reinforced by the quilting if possible, I went with the phase-flipped single wiggle square pattern. But I got bogged down trying to piece the squares together and only made righty hooked ones. I only needed three whole squares but most of my fabric was single sided, so I couldn't flip anything except the gingham.
I ripped the stitches on the nearly three foot seam and started to flip it over, then realized if I just moved it I'd get the same effect.


  The more I look at them the better I like these fishy shapes!  Now the idea of piecing and all the hassle of matching seams front to back seems a bit much and the two axis project is on hold waiting for a back. The gold fish project is begun.


Tuesday, January 24, 2017

Two Axis Progress one

I'm nowhere near done but I've got a good start. It's big enough to tell I want a whole quilt first time out, and probably a baby blanket too. I thumb-nailed a a mock up to get an idea of how many of each piece I would need. I had some velum graph paper (you can erase and redraw on this a lot!) it's pretty transparent so I made flaps and doped out a couple of different backs to see how big the pieces would be.


   This quilt is made from the scraps left over from a lot of other projects. There is no budget for this project so I won't be trying to hold out for a single piece back. These designs don't look like they're gonna save much fabric, but all their seams fall right on seams on the two axis top.I'll probably string a tie from front to back in the center of every roundy edged square to its reference dot on                                                  the back. To be sure the seams match up,                                                      before I  begin the quilting I plan to reference                                                  them with  hand stitches from the back to front.

Saturday, January 7, 2017

Celadon Topped And Two Axis Simplified Begun

 Even with no fixed plan for this quilt, the  large hexagons really moved it along. Sewing late at night and on the weekends I still managed to get this far in two weeks and tile a shower during the same two weeks. As it got bigger I kept laying it out on top of a queen sized bed and turning it various ways and pining on pieces according to the cheat sheet. None of it is pre shrunk so I'm expecting 14% shrinkage (ow). With the rows running lengthwise on the bed alternating lefty righty there's a wavy edge about 5 or 6 inches off each side of the mattress. because of the way the hexes touch it should be possible to cut straight across each end and have solid green straight edges top and bottom.


 Since I've got to wait a bit before I can get my batting and the material for the back I dragged out an earlier project and decided to take another run at it. To the right is the foam board experiment cut in with an Xacto knife and stuffed down in the cuts with a piece of a credit card. Next to it is a section of the densest sample I was able to sew. It was crazy slow and that is the only piece I made that size. It might be good for clothes though.

In this picture the sane arrangement has room for fourteen or so sock monkeys per square instead 1 3/4 monkeys like the earlier test. The goal is to make the top out of the full two axis pattern quilting atop each edge and piecing the back together out of larger single wiggle squares. The idea is to reference front to back by basting the lines of the back to the front network by hand, then quilt it all by machine from the front. There's still a lot of  piecing and sewing  before the back is a factor but so far I'm enthused.

Saturday, December 10, 2016

The Celadon Cyclogon Quilt Is Begun


  Even more experimental than usual. The Celadon                   CyclogonQuilt is actually short for the "Phase flipped side       slipped single wiggle snub hexagon quilt". Despite it's eight word name this quilt has had a much more informal beginning than mosta sheet of the three axis circle net.  I outlined a single wiggle triangle with a sharpie and blew it up on the copier till it filled the page. I then made six more copies and glue sticked six of them together to make the hexagon in the same scale. I bought three yards each of two shades of sage green solids, and two yards each of chocolate brown and buff solids. I cut out as many single wiggle hexagons I could, being careful not to flip the pattern or fabric, of one shade of green. Then I flipped the pattern so it hooked the other way and cut as many as I could of the other shade.
of my previous quilts. Instead of a fixed plan for size and layout, I just printed


 I then made a bunch of triangles hooking in both colors, hooking both directions and began sewing them together using a print out of the phase flipped side slipped single wiggle snub hexagon from below as a guide. I've been pretty busy this week so I only got in a couple of late night hours progress each day, still it's getting pretty big already. It's already bigger than a baby blanket ( in five days).    


Thursday, December 10, 2015

TRUST YOUR HEART

"Trust Your Heart To Lead You Home" is a triptych carved on cherry wood panels. This mosaic mock-up is a variation on the third panel, and is my fourth effort at a feasible cyclocentric mosaic in tile. It contains samples of  five polygons not commonly seen in tile in five networks similarly underused, these polygons have all been test cut (with diamond tools) in the sizes necessary to produce this image for a back-splash 41 5/8 in x 87 in.  
These examples represent the smallest pieces I was able to cut consistently. Quite a number of them just broke from the strain, and more than a few were backwards (the wiggle has a direction). It wasn't until later that I realized those backwards pieces were the key to an even odder group of symmetries. I was moving them around wondering just how one might join lefty wiggles to righty ones. I had to flip some over because so far I had no place for out of phase pieces. That was before I discovered "phase flip, side slip".
Applied to the triple wiggle triangle window, these phase flipped triangles don't just wiggle they crawl. The effect on the other cyclocentric polyhedra is no less pronounced.


first posted on LinkedIn Dec10,2015

Wednesday, June 24, 2015

Chicken Says

Ok, Chicken says, "It's time to wrap it up." This project's been done, and the next one's well on it's way. So here's a couple of quick tips on how the quilting layout went.

At first I was a bit at a loss for what might be useful, but after trying a bunch of different templates it came down to two. The first one was just to locate the intersections.

  The other template was only for laying out

 the fishes. While the chalk marks were fragile,  with a few different colors of chalk to make the new marks easier to identify it went pretty smoothly, if slowly.


 I realize that  people who sew much don't need many hints, so I'm taking a break and letting Chicken finish this up.


Chicken was in no way inconvenienced, (He likes the cape).


Tuesday, May 26, 2015

Quilting Single Wiggle Square BabyBlanket

Everything about this quilt was more straightforward than the last one. No surprise, this one was tested better and sewed over and over till it worked reasonably well. Both the corners and the curvy joins (slightly visible on each edge) required ripping out and resewing several times to work. There was another surprise when it came time to make the back. Using the template for the border as a guide it wasn't too challenging to make a pattern the size the field should have been.


 The template for the back was made to equal the six square width of the field. The squares of the field were cut out with a quarter inch tab all around. After sewing, the whole field had drawn up enough to hide about a quarter of an inch under the template for the back. So instead of adding a quarter inch for a sewing tab when I cut it out, I trimmed off a quarter inch all the way around.

  Looking closely you can find the curvy joins and fancy corners in the picture on the right. The joins hid better than the corners, but it all worked well enough to use it again.                        


After batting, pinning, and basting shut the whole thing shut, it got it's batting secured at the edge and shaken ever which way. Laying flat it was safety pinned around the border checking to be sure front and back were lined up. The edge of the border was then hand sewed, then machine sewed from the top along with the rest of the wiggly squares.


The resulting slight stagger (mostly less than an eighth of an inch) bugged me some, but I'd do it again.

Ok baby-steps, that's a wrap.


Monday, May 25, 2015

CYCLOCENTRIC SINGLE WIGGLE SQUARE-BEGINNINGS

I've been looking forward to making something with Single Wiggle Squares for a while now. Because this network is most easily generated by a grid of regular squares I tend to think of it as a fourfold network. This network generates circles of four fishes surrounding flower like figures sharing fishes with the four surrounding circles. Quilting this pattern is accomplished with pairs of wavy lines running two directions. Once again the colored pencils allowed me to change colors instead of erasing my error. This was my third poster paper sheet of this network. In the end I filled the whole sheet and then some making patterns for the back and border, cutting and taping as necessary.

Instead of bigger squares with the full quilting everywhere, I made them as small as I felt would be workable on the sewing machine. Outlining each piece
(single wiggle squares this time) and filling the half a square wide border plus a half square of each outside square in the field (center of wiggly squares).

I went through enough weirdness with odd fabrics in my first few projects. This time, it's all calico and gingham. If I counted right there are 13 kinds of calico and 2 kinds of gingham. It would have been simpler to make the whole back and border one piece. Instead I wanted to give the synced up front to back border one more try, with the quilting uniting the simplified center field with the barely marked, fully quilted border. Ideally, every fabric join should fall under a wiggly line of quilting.


 There were four of these made of gingham sewn together to make the frame/border, but first there were several traced on bakers parchment, cut out, folded up and test fitted around the field to make sure they'd fit. Several didn't fit, but eventually the corrections yielded the one below which led to what is probably the correct pattern at left. Baker's parchment is weird stuff. It's fairly transparent, but it won't hold tape or glue-stick worth a damn. It was however always in the kitchen and cheaper than vellum or some other tracing paper.


Saturday, May 23, 2015

IF NOT FOR TEDI-CAM, POTHOLDER

If not for Tedi-Cam, well it's all there on the potholder. These images are both from my book "My First Hundred Teefes", so far published only on Kindle ( Except for 19 copies). They like all the images in the book were black and white line drawings.

The "Hyah" baby blanket didn't make it this time. So for now this potholder is on the short list of "My First Hundred Teefes" ephemera.


 I hope one day to get some better pictures but for now I'm just glad I got it finished and under the care of Dr Mo.

FIRST DOUBLE WIGGLE SIMPLIFIED BABY BLANKET MAILED

The Cyclocentric Double Wiggle Triangle Simplified baby blanket, to be more precise, is completed. Quilted, hand washed, and hanging to dry in the sun, seems to me to have an extra wide border. Flaws and all, I'm pleased enough with it that I've already begun plans for the next "simplified" test. It looks a little dark, it would it's still damp. I was still a little shy about this one. Even though my front to back border matching method wasn't great this time, I hope to get it eventually. It is proof of concept. I only got a few pictures of it, but there's time it stayed in the family.


I'm sure it'll be more opaque when it's dry. As it is it looks almost stained glass like from some angles.