
The template for the back was made to equal the six square width of the field. The squares of the field were cut out with a quarter inch tab all around. After sewing, the whole field had drawn up enough to hide about a quarter of an inch under the template for the back. So instead of adding a quarter inch for a sewing tab when I cut it out, I trimmed off a quarter inch all the way around.
 Looking closely you can find the curvy joins and fancy corners in the picture on the right. The joins hid better than the corners, but it all worked well enough to use it again.
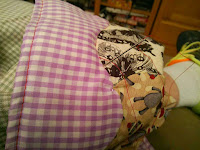
 After batting, pinning, and basting shut the whole thing shut, it got it's batting secured at the edge and shaken ever which way. Laying flat it was safety pinned around the border checking to be sure front and back were lined up. The edge of the border was then hand sewed, then machine sewed from the top along with the rest of the wiggly squares.
 The resulting slight stagger (mostly less than an eighth of an inch) bugged me some, but I'd do it again.
Ok baby-steps, that's a wrap.


Ok baby-steps, that's a wrap.
No comments:
Post a Comment